Establishing a Connection
For this section, you will need:
Before you start, please make sure your SFDC API is turned on and you have access to it.
If you're looking for instructions for installing SFDC Gallery App in Classic or Lightning, find information in these articles:
- Salesforce.Com (SFDC) Gallery App: Install And Permissions
- Installing The Salesforce (SFDC) Gallery App In Lightning
Connect Salesforce.com (SFDC) in Kapost using a user account you want to be the main connection for Kapost. This is the username will display when Content is added in the chatter messages. It's best practice to create a new user specifically for your Kapost integration, if possible. This way you can give them very specific permissions without giving them to everyone else who shares a user type.
Log into Salesforce.com as the user you selected to be the Main User. Click your name at the top right and go to Setup:

On the bar on the left, scroll down and go to Manage Users and click Profiles:
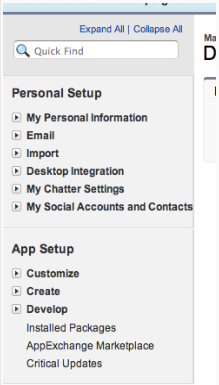
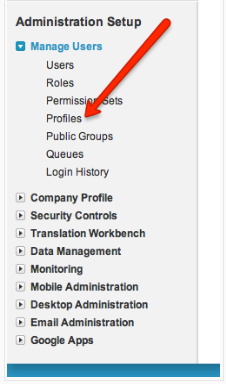
You will see a list of the different user profile types. Select the user type that corresponds to the chosen user you have chosen to integrate with Kapost. For instance, if the user you have selected is a Standard User, go to Standard User, or if they are a System Administrator click on System Administrator.
Note: If you don't know your user type, you can find out by going to Users under Manage Users. The profile type will be listed in the Profile column.
Once you are on the correct profile type for your chosen user, you can scroll down to Administrative Preferences and enable your API.
There are two options that must be checked.
The first is API Enabled:

And the second is Modify All Data:

If you're setting up Kapost to push to Libraries, Chatter, or Objects, continue with the steps below.
The next step is to enable CRM. On the left sidebar, go to App Setup and click Customize. From the option list that appears below it, choose Salesforce CRM Content.
Note: Only Admins will be able to see this step.
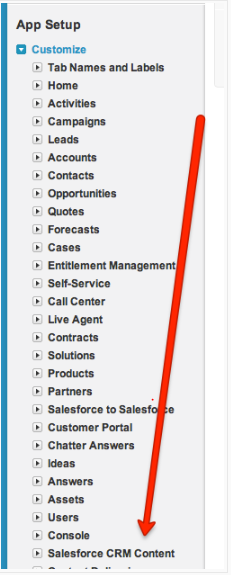
You will be taken to the Salesforce CRM Content page. Click Edit Organization Settings.
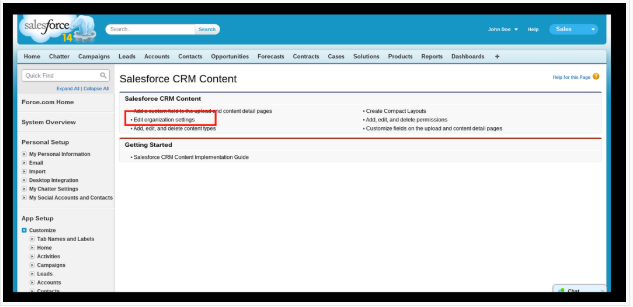
Click Edit, then check the box next to Enable Salesforce CRM Content.
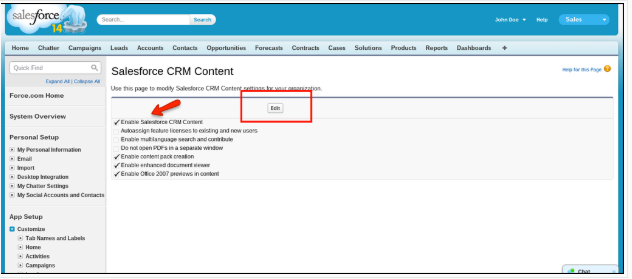
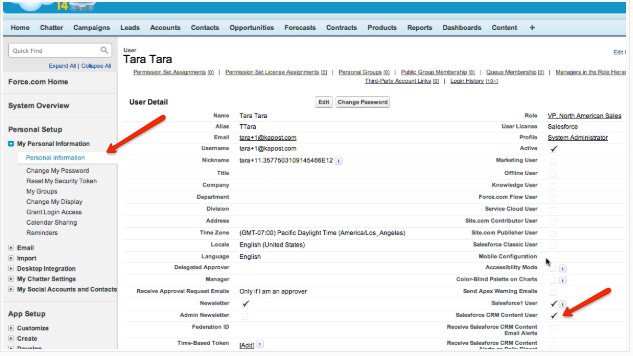
There is one last step to enabling CRM: Make sure your chosen user is enabled as a Salesforce CRM Content User.
To do this, make sure you are logged in as your company's username and click Setup. On the left hand menu, click My Personal Information and select Personal Information from the menu below it. On that page, make sure Salesforce CRM Content User is checked off.
Creating the connection
-
Log into the SFDC instance you wish to connect as the user you wish to connect to.
- Log into the App Center Tab.
- Click the Install more apps button below the list of current connections.
- In the Kapost App Center, click on the product tile.
- From the “Select Instance” dropdown menu near the bottom of the expanded tile, select your Kapost instance.
- You will see the Kapost App Center settings page once again, now with a connection panel open.
- You will be taken back to your list of distributions. A Salesforce modal will appear asking you which features you would like to enable for this connection. It is possible to install multiple SFDC connections with different permissions.
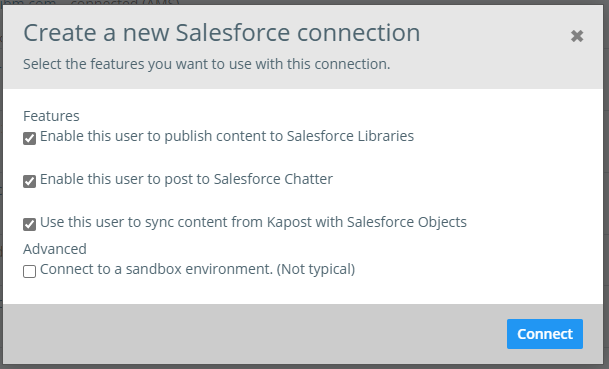
Note: If you enable Chatter it will send the published links to your Kapost assets to Chatter by default.
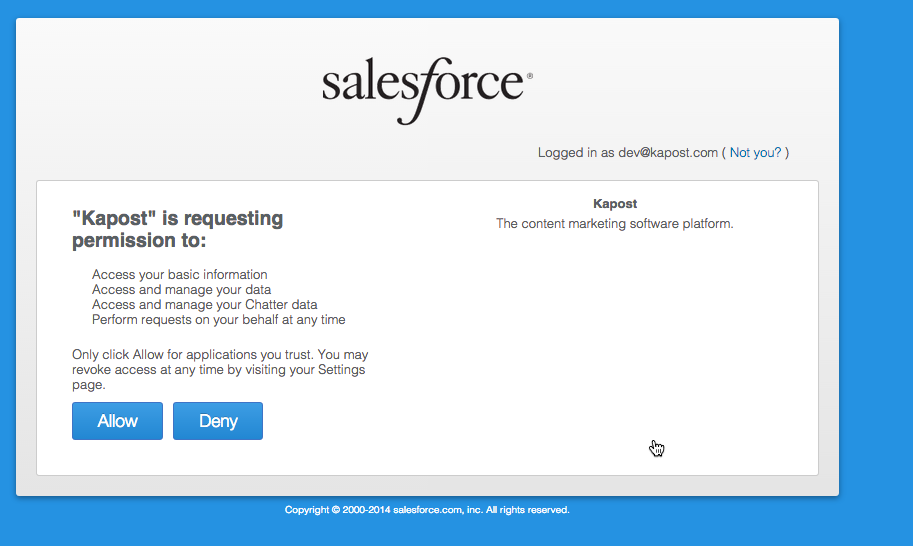
- After you click Connect, a permissions window will pop up. Click allow.
If you selected Libraries as an available feature, choose which libraries you would like to connect to.
Configure a Content Type
You will now have to associate this connection as a primary destination for a File content type. Or, you can associate this connection as a promotion destination for blog posts and file content types.
Kapost uses an API with an SSL connection between our server and SFDC.
To be more specific, we make requests to the SFDC API using the Salesforce user's oauth token. We are unable to access any data that user is unable to access and we do not store any information on our servers other than SFDC Object IDs (ex, Contact ID).
- 3rd party cookies are required to be on for SFGA